

Blog
Back to School SVG Cut Files for Cricut: Teacher Gifts

Last August, I sat at my kitchen table at 11 PM surrounded by a pile of mugs, iron-on vinyl scraps, and a Cricut that was judging me silently. I had nine teacher gifts to make before the first day of school and exactly zero organized SVG files to show for it. Sound familiar? If you have ever scrambled to find the right back to school SVG cut files for Cricut the night before orientation, this post is going to save your sanity — and your sleep schedule.
Teacher gifts made with a Cricut are genuinely one of the most thoughtful things you can give. A personalized tumbler, a custom tote bag, a laminated bookmark with a sweet quote — these things cost very little to make but mean everything to a teacher who just spent her own money on classroom supplies. The secret is having the right SVG files for Cricut ready to go before the back-to-school rush hits.
In this post, we are covering everything from choosing the right file format to troubleshooting upload errors, plus our favorite designs for teacher appreciation projects. Let’s get into it.
Best Back to School SVG Cut Files for Teacher Gifts
Not all back to school SVG cut files for Cricut are created equal. For teacher gifts specifically, you want designs that feel warm and personal — not generic clip art. Here are the most popular categories our crafters reach for every August:
- Teacher appreciation quotes — “Teaching is a Work of Heart,” “World’s Best Teacher,” “Fueled by Coffee and Dry Erase Markers”
- Apple and pencil motifs — Classic, clean, and always appropriate for any grade level
- Chalkboard-style lettering — Great for tumblers, wine glasses, and tote bags
- Subject-specific designs — Math symbols for the algebra teacher, book stacks for the librarian, musical notes for the band director
- Classroom supply icons — Scissors, rulers, crayons, and staplers make adorable accent graphics
- Name and initial monograms — Pair these with a floral frame for an elegant, personalized gift
- First day of school signs — Perfect for photo props that parents and teachers both love
The best back to school SVG cut files for Cricut come in layered formats so you can mix colors and materials. More on that in the layered SVG section below.
Want to browse over 27,000 designs right now? Check out our full collection of SVG files for Cricut — new back to school designs are added every single week.
SVG vs DXF vs PNG: Which Format Is Best for Cricut Cutting?
This is one of the most common questions we get from crafters who are just getting started with back to school SVG cut files for Cricut. Here is the honest breakdown:
SVG (Scalable Vector Graphics)
SVG is the gold standard for Cricut cutting. It is a vector format, which means you can resize it to any dimension — from a tiny 1-inch sticker to a giant 24-inch banner — without any loss of quality. SVG files also preserve layers, so each color element stays separate and easy to work with in Cricut Design Space.
DXF (Drawing Exchange Format)
DXF files are also vector-based and work well with Cricut and Silhouette machines. However, they do not always carry color information, so you may need to manually assign colors to layers in Design Space. DXF is especially popular with Silhouette Studio users. If a bundle includes both SVG and DXF, always reach for the SVG first for Cricut projects.
PNG (Portable Network Graphics)
PNG is a raster (pixel-based) image. Cricut Design Space can use PNGs, but it has to trace the image first to create a cut path. This works fine for simple designs but can get messy with detailed back to school SVG cut files. PNG is best used for printing (like sublimation or printable vinyl) rather than precision cutting.
How to Unzip Your SVG Files (Step-by-Step)
Every back to school SVG cut file bundle you download will arrive as a ZIP file. You must unzip it before Cricut Design Space can read the files. Here is exactly how to do it on any device.
Step 1: Find Your Downloaded ZIP File
After your instant download completes, locate the ZIP file in your Downloads folder. On a PC it will have a zipper icon. On a Mac it may auto-extract, but you will still see the folder appear in Downloads.
- On Windows: Right-click the ZIP file → select “Extract All” → choose a destination folder like “Back to School SVGs” on your Desktop
- On Mac: Double-click the ZIP file and it will automatically extract to the same folder
- On iPad/iPhone: Tap the ZIP file in the Files app → it extracts automatically into the same location
Step 2: Organize Your SVG Files into Folders
Before you open Cricut Design Space, take two minutes to organize. Create a folder called “Back to School SVGs” and inside it create subfolders by project type — “Teacher Gifts,” “First Day Signs,” “Classroom Decor.” This saves enormous time when you are mid-project.
- Keep your original ZIP file as a backup — store it in Google Drive or iCloud
- Never try to upload directly from inside a ZIP — always extract first
- Name folders by year too (e.g., “Teacher Gifts 2025”) so you can reuse designs next year
Using Back to School SVG Cut Files in Cricut Design Space
Step 3: Upload Your SVG to Cricut Design Space
Open Cricut Design Space and start a new project. Click the “Upload” button on the left panel. Select “Upload Image,” then browse to your extracted SVG file and click it. Design Space will recognize it instantly as a cut file — you will not need to trace anything.
- Click “Save” when prompted — this adds the file to your uploaded images library
- Then click the saved image and hit “Add to Canvas” to place it on your project
- SVG layers will appear automatically in the Layers panel on the right side
Step 4: Resize and Arrange Your Design
This is where back to school SVG cut files for Cricut really shine — you can resize freely without losing quality. Click your design on the canvas, then use the Size fields in the top toolbar to enter exact dimensions.
- For a 20 oz tumbler: keep your design between 3.5″ wide and 8.5″ tall
- For a standard tote bag: aim for 8″–10″ wide for a bold, visible design
- For a 4″×6″ bookmark: keep designs under 3.5″ wide
- Always click the lock icon next to the size fields to maintain proportions
- Use “Align” tools to center your design perfectly before cutting
Once your design is sized correctly, click “Make It.” Design Space will show you a mat preview. Confirm your material setting — for iron-on vinyl on a teacher gift tumbler, select “Everyday Iron On” and mirror your design before cutting.
Need a refresher on the whole process? Our Ultimate Guide to SVG Files for Cricut walks through every step with screenshots.
Using Back to School SVG Cut Files in Silhouette Studio
If you craft with a Silhouette Cameo or Portrait instead of a Cricut, you are still in great shape. Most back to school SVG cut files for Cricut work perfectly in Silhouette Studio too — with a couple of small differences.
- Silhouette Studio Basic (free version): Does not natively open SVG files. You will need to use the DXF version of your design, or upgrade to Silhouette Studio Designer Edition ($49.99 one-time) to unlock SVG import.
- Silhouette Studio Designer Edition and above: Go to File → Open → browse to your SVG file. It imports beautifully with all layers intact.
- Sizing in Silhouette: Use the Transform panel (Object → Transform) to enter exact width and height. Always check “Lock Aspect Ratio.”
- Cut settings for vinyl in Silhouette: Use the Send panel, select your material type, and adjust blade depth. For standard adhesive vinyl, blade depth 2, speed 5, and force 10 is a reliable starting point.
Our bundles include both SVG and DXF files wherever possible, so Silhouette users on the free version are always covered.
Layered School SVG Files Explained
Layered back to school SVG cut files for Cricut are what separate a flat, one-color design from a stunning, multi-dimensional teacher gift. Here is what layering means in practice:
A layered SVG contains multiple separate shapes stacked on top of each other. Each shape is a different color — and in Design Space, each color becomes a separate cut layer. You cut each layer from a different color of vinyl or cardstock, then stack them together to create depth and dimension.
For example, a layered “Best Teacher” apple design might have:
- Layer 1 (bottom): Red apple shape cut from red vinyl
- Layer 2: Green leaf cut from green vinyl
- Layer 3: White highlight cut from white vinyl
- Layer 4 (top): Black lettering cut from black vinyl
The result looks like a professionally printed design — but you made it with a $30 bundle and a roll of vinyl.
Checking Sizes Before You Make Your Cuts
One of the most expensive mistakes you can make with back to school SVG cut files for Cricut is cutting the wrong size and wasting vinyl or iron-on. Here is a quick size-check routine to run before every project:
- Measure your blank first. Grab a ruler and measure the actual printable area of your mug, tumbler, tote, or shirt before you set your design size in Design Space.
- Use the “Print Preview” trick. Before cutting, reduce your design to the target size and print a test copy on regular paper. Cut it out and hold it against your blank. This costs 1 cent and saves $3–$10 in wasted vinyl.
- Check mat size vs. design size. Design Space will warn you if your design is larger than your mat, but it will not warn you if your design is too large for your blank. That is your job to check.
- Standard teacher gift size reference:
- Mug wrap (standard 11 oz mug): 8.5″ wide × 3.75″ tall maximum
- Tumbler (20 oz Skinny): 8.5″ wide × 3.5″ tall maximum
- Adult t-shirt chest: 10″–12″ wide
- Tote bag front panel: 10″–14″ wide
- Bookmark: 2″–3″ wide × 5″–7″ tall
Customizing SVG Cut Files for Banners, Labels, and More
Back to school SVG cut files for Cricut are incredibly versatile. Beyond the classic tumbler and tote bag, here are some creative teacher gift projects that use the same SVG files in different ways:
Classroom Welcome Banners
Use a large back to school SVG with pennant shapes to cut individual banner flags from cardstock. A “Welcome Back!” banner made from 12 pennants looks stunning strung across a classroom doorway. Cut each flag at 5″ wide × 7″ tall from 65 lb. cardstock — a standard 12×12 sheet gives you two flags per sheet.
Personalized Gift Tags and Labels
Resize any teacher quote SVG down to 2″–3″ wide and cut it from kraft cardstock or white cardstock. Punch a hole in the corner, thread with twine, and attach to a gift bag. This takes under 10 minutes and looks 100% professional.
Mason Jar Labels
Cut a back to school SVG from adhesive vinyl and apply it directly to a mason jar filled with candy, coffee pods, or school supplies. Use Oracle 651 permanent vinyl for dishwasher-safe results. Cut settings: Fine Point blade, Vinyl (standard) material setting in Design Space.
Iron-On Tote Bags
Teacher tote bags are a perennial favorite. Use Everyday Iron On vinyl, mirror your design in Design Space, cut at 10″ wide, weed carefully, and press at 315°F for 30 seconds with firm pressure. Peel warm (not hot) for the cleanest results.
Acrylic Keychains
If you have a Cricut Maker, you can cut back to school SVG cut files from printable acrylic sheets to create adorable teacher keychains. Set your machine to the “Printable Vinyl” or “Glitter Cardstock” setting as a starting point and do a test cut first.
Troubleshooting Cricut Upload Errors with SVG Files
Even experienced crafters run into upload hiccups with back to school SVG cut files for Cricut. Here is a quick troubleshooting guide for the most common errors:
Error: “This file type is not supported”
This almost always means one of two things: you are trying to upload the ZIP file instead of the extracted SVG, or the file extension is showing as something other than .svg. Solution: Re-extract the ZIP, locate the actual .svg file inside the folder, and upload that specific file.
Error: Design uploads but appears as a solid black blob
This happens when Design Space reads your SVG as a print image instead of a cut file. When the upload screen asks “What kind of image is this?” — select “Cut Image,” not “Print Then Cut.” If you already saved it incorrectly, delete it from your uploads library and re-upload, choosing “Cut Image.”
Error: Layers are missing or merged together
Some SVG files use grouping or clipping masks that Design Space cannot interpret correctly. Try opening the SVG in a free program like Inkscape, ungrouping all elements (Ctrl+Shift+G), removing any clipping masks, and re-saving as a plain SVG. Then re-upload to Design Space.
Error: Design looks correct on screen but cuts in the wrong place on the mat
This is a calibration issue, not an SVG issue. Go to Cricut Design Space → Account → Calibration → Blade Calibration and run the calibration process. This takes about 5 minutes and fixes offset cutting permanently.
Error: Design Space crashes when uploading large bundles
If you are uploading many back to school SVG cut files for Cricut at once, upload them in batches of 10–15 files rather than all at once. Large batch uploads can time out or crash the browser version of Design Space. The desktop app handles large uploads more reliably than the browser version.
For more detailed guidance on working with SVG files, our Ultimate Guide to SVG Files for Cricut covers every scenario with step-by-step screenshots.
Our Favorite Back to School SVG Bundles for Cricut
Now that you know exactly how to use back to school SVG cut files for Cricut, let us talk about where to get the best value. Here are our top picks at BundleArtSVG:
500,000+ Ultimate SVG Mega Bundle
Only $29.99
4.96/5 stars from 26 reviews — the most complete SVG library for Cricut crafters. Just $0.000059 per file.
This bundle is the one we recommend for serious crafters who make teacher gifts every year. At just $0.000059 per file, you get back to school SVG cut files for Cricut, holiday designs, monograms, floral frames, and hundreds of teacher-specific quotes — all in one instant download. Rated 4.96/5 stars by 26+ real crafters, this is the most complete SVG library we offer.
4000+ Magical Mega SVG Bundle
Only $7.99
5.00/5 stars — 4,000+ designs for just $0.002 per file.
If you want a budget-friendly starting point, the 4000+ Magical Mega SVG Bundle is rated a perfect 5.00/5 stars and gives you over 4,000 designs for just $7.99 — that is $0.002 per file. It is an incredible value for anyone making teacher gifts on a tight timeline.
And do not forget — beautiful teacher gift designs need beautiful lettering. Pair your back to school SVG cut files for Cricut with our font bundle:
45 gorgeous fonts for just $0.99 — rated a perfect 5.00/5 stars. Use these to add a teacher’s name, a personal message, or a custom classroom phrase to any back to school SVG cut file. These fonts install directly to your computer and appear in Cricut Design Space’s font list automatically.
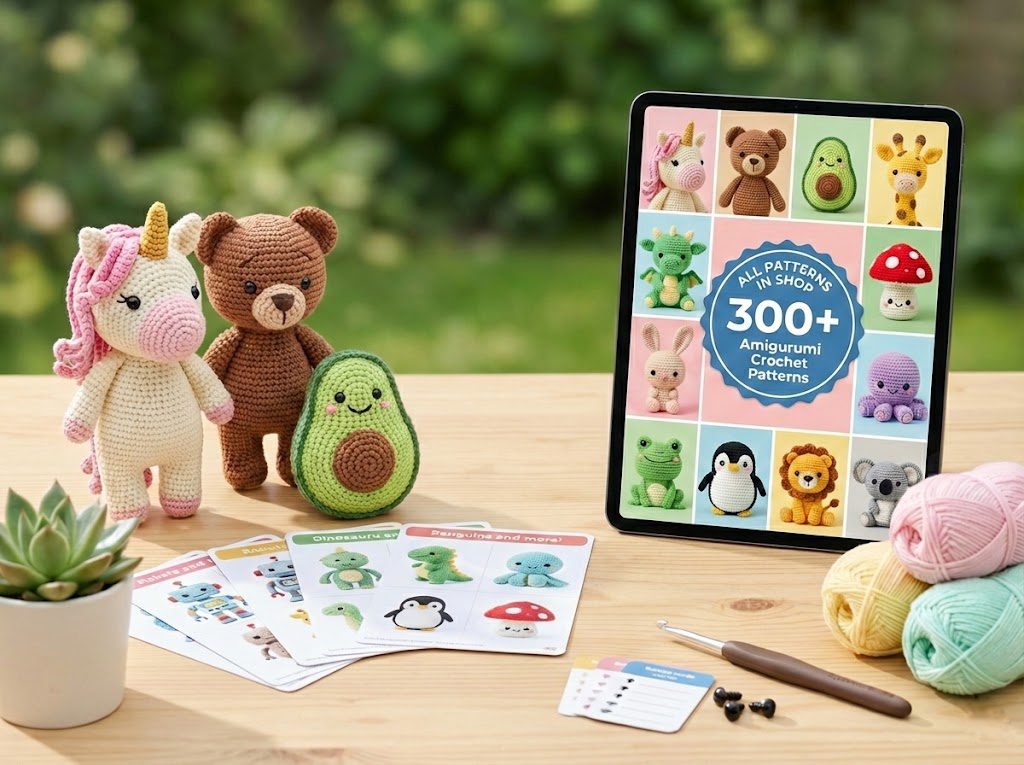
We also have beautiful coloring pages that make wonderful back-to-school gifts for younger students and classroom activity packs. And if you love fiber arts, our crochet patterns include adorable school-themed amigurumi that make unforgettable teacher gifts.
Get Free Back to School SVG Downloads
🎁 Get FREE Designs Today!
Perfect for testing with your Cricut or Silhouette machine before committing to a paid bundle.
Not ready to commit to a bundle yet? We totally get it. Browse our free SVG downloads to test a few back to school designs with your machine before you buy. It is a great way to practice your upload workflow, test your vinyl settings, and make sure everything cuts beautifully before the big back-to-school crunch.
Frequently Asked Questions
What are the best back to school SVG cut files for Cricut teacher gifts?
The best back to school SVG cut files for Cricut teacher gifts include layered apple designs, teacher quote graphics (like “Teaching is a Work of Heart”), chalkboard-style lettering, pencil and ruler motifs, and personalized monogram frames. Look for SVG files that include both SVG and DXF formats so you can use them with Cricut and Silhouette machines. Our 500,000+ Ultimate SVG Mega Bundle includes hundreds of teacher-specific designs at just $0.000059 per file.
How do I upload SVG cut files to Cricut Design Space?
First, extract your ZIP file to a folder on your computer. Then open Cricut Design Space, start a new project, and click “Upload” on the left panel. Select “Upload Image,” browse to your SVG file, and click it. Design Space will recognize it as a cut file automatically. Click “Save,” then “Add to Canvas” to place it in your project. Resize using the size fields in the top toolbar before cutting.
Can I use back to school SVG cut files for Cricut on a Silhouette machine?
Yes! Most back to school SVG cut files work with Silhouette machines too. If you have Silhouette Studio Designer Edition or higher, you can open SVG files directly. If you use the free version of Silhouette Studio, use the DXF version of the file instead. Our bundles include DXF files alongside SVGs so every crafter is covered regardless of their machine.
What vinyl settings should I use for teacher gift projects with Cricut?
For iron-on vinyl on tote bags and shirts, select “Everyday Iron On” in Cricut Design Space, enable Mirror, and press at 315°F for 30 seconds with firm pressure — peel warm. For adhesive vinyl on mugs and tumblers, select “Vinyl (Standard)” and use Oracle 651 for a permanent, waterproof result. Always do a test cut on a small piece of vinyl before cutting your full back to school SVG design.
Do BundleArtSVG files include a commercial use license?
Yes! All back to school SVG cut files for Cricut purchased from BundleArtSVG include a commercial use license. This means you can use the designs to create physical products — like teacher gift mugs,